How to lay a guide wire in a boundary wire Automower® installation
Applies to installations with a physical boundary wire.
The patented guide wire plays a key role in your Automower® installation by helping the robotic lawn mower quickly and efficiently find its way back to the charging station. This significantly reduces search times, especially in complex lawns with many obstacles.
Additionally, guide wires direct the robotic lawn mower to remote work areas and manage passages as narrow as 60 cm (2 ft). For passages narrower than 2 m (6.5 ft), we strongly recommend using a guide wire to ensure smooth navigation. The lawn mower varies its route to and from the charging station to prevent leaving tracks on the lawn.
- Some Automower® models require a guide wire, while for others it’s optional.
- We always recommend installing one or more guide wires for optimal performance.
- The number of guide wires your mower supports depends on its model.
How to lay a guide wire: step-by-step instructions
Tip: To view subtitles on the instructional video, start playing it, click the gear icon (settings), select “Subtitles/CC” and choose your preferred language.
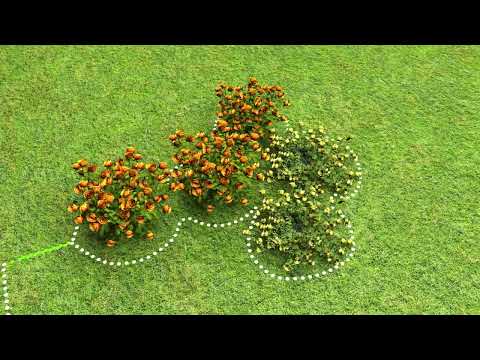
Before you begin
- Ensure the charging station is powered OFF. Unplug it from the electrical outlet before starting the installation.
Step 1: start at the charging station
- Start laying the wire at the rear of the charging station, centred beneath the base plate (image 1).
- Connect one end of the guide wire to the charging station and the other end to the boundary wire.
- Use the same type of wire throughout your installation. The guide wire and boundary wire should be identical to ensure compatibility.
- Use original Husqvarna parts: Use Automower® Connectors and Couplers to link the guide wire to the charging station and boundary wire. These high-quality accessories ensure secure and reliable connections (image 2 and 3).
Step 2: connect the guide wire
- Attach an Automower® Connector to the guide wire’s end and plug it into the G1 pin on the charging station, or G2 or G3 if using a second or third guide wire (see image 1).
- Label each wire for easy identification, especially if you store the charging station indoors during winter.
- For Automower® NERA models, all connectors are accessible from the front of the charging station.
Image 1
Image 2
Step 3: lay the wire
- From the charging station, lay the wire straight for at least 2 m (6.5 ft); for Aspire™ R4, lay 1 m (3.3 ft).
- Secure the wire to the ground using stakes along the entire path to the boundary wire connection point. Alternatively, bury the wire.
Step 4: connect to the boundary wire
- At the connection point, cut the boundary wire using a pair of wire cutters. Connect the end of the guide wire to the boundary wire using an Automower® coupler.
- For detailed instructions, see How to use an Automower® Coupler.
Image 3
Step 5: calibrate and verify
- After installation, calibrate the guide wire and confirm that the mower can follow it easily back to the charging station.
- For detailed instructions see: Calibrating the guide wire and How to make sure the mower follows the guide wire and docks correctly.
Helpful tips for guide wire installation
- On an open lawn, lay the guide wire from the charging station to a central point on the opposite side of the lawn.
- Avoid laying the wire at sharp angles above 45°, as this can make it difficult for the robotic lawn mower to follow the guide wire.
- The mower always runs to the left of the guide wire as seen facing the charging station. Ensure there is enough space on the left side.
- On slopes, lay the wire diagonally for better traction.
- The guide wire should not cross the boundary wire (for example, near an island).
- Keep at least 30 cm (12 in) distance between the guide wire and boundary wire.
- If the guide wire loop exceeds 400 m (1,300 ft), or 150 m (490 ft) for Aspire™ R4, mower navigation may become difficult.
Model-specific guide wire details
- Automower® 320 NERA, 305E NERA and 310E NERA models have three guide wire connectors but support only two guide wires (G1 and G2). Connecting to G3 won’t work.
- Automower® 405XE NERA, 410XE NERA, 430X NERA and 450X NERA models support all three guide wires.
- Automower® Aspire™ R4 requires a guide wire for operation. It is not optional for this model.
Example: guide wire installation layout
In the example below:
- One guide wire leads the mower around the house to the garage.
- Another guide wire directs the mower through a fence, down a slope, through a narrow passage and to the greenhouse.
- These guide wires help the mower efficiently navigate and find its way back to the charging station.
Adjusting guide wire and lawn coverage settings
After installing the guide wire, adjust the lawn coverage settings according to your lawn’s complexity to ensure full coverage:
- If your mower supports GPS-assisted navigation, it will use built-in GPS to automatically determine mowing priorities.
- Otherwise, adjust lawn coverage settings to guide the mower using the boundary and guide wires.
You can modify these settings in:
- Automower® Connect app: Go to More > Settings > Installation > Lawn Coverage
- Mower display (if available): Go to Installation > Lawn Coverage
Note:
If your mower supports AIM Technology, you get even greater control by creating work areas with unique schedules and cutting heights via the Automower® Connect app.