Installation Made Simple
Installing your robotic mower can be done in a series of simple steps. And, depending on your lawn size and complexity, the total time can range from 2 to 5 hours. Read below for more information on how to prepare for install, both prior to and on the day – including mowing your lawn one last time.

Installing your robotic mower can be done in a series of simple steps. And, depending on your lawn size and complexity, the total time can range from 2 to 5 hours. Read below for more information on how to prepare for install, both prior to and on the day – including mowing your lawn one last time.

DIY Installation - What's Included
To complete a DIY installation, you’ll need a pair of pliers, a mallet and a small garden shovel. Everything else you need is included with your Automower®!
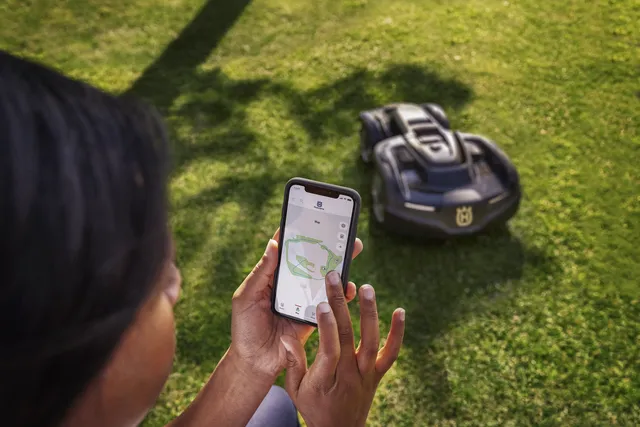
Watch these short videos for Step-by-Step Instructions on Installing your Automower®


Automower® pre-installation checklist
- Before your installation day, make sure you’ve completed the following steps.
- Have underground utility lines located and marked by calling your municipality’s 811 agency
- Confirm you have a working outdoor power outlet within 30 ft of where you plan to place the charging station
- Cut grass to the desired height the day before you plan to install Automower®
- If you have an invisible pet fence, obtain and mark approximate wire location
Automower® day-of installation checklist
- When you’re ready to install, make sure you’ve completed the following steps.
- Walk your lawn noting any holes, exposed roots or low drainage areas – for optimal Automower® performance, we recommend repairing these areas prior to installation
- Pick up all debris from your yard including sticks, toys and any potential obstacle
- Make sure you have a pair of pliers, a mallet and a small garden shovel – everything else you need is included!
Automower® installation FAQs
No, the wire can also be stapled to the surface of the ground with the staples included in the installation kit. In a few weeks, the wire will disappear into your lawn.
Yes, the same wire is used for both the guide and boundary.
Yes, we recommend mowing your lawn prior to installation. Cut the lawn short around the perimeter so the wire can lay as close to the ground as possible.
Yes, first plug the power supply into the low voltage cable and then plug the low voltage cable into the charging station. Next, plug the power supply into a 110V outlet. Set the mower's main switch to position 1 and push Automower® into the charging station.
Yes, an island can be added after the initial install by splicing into the boundary wire. You can purchase a splicing kit and additional wire here.
It is always best to install a guide wire to help Automower® get home more quickly when needed. Note, the 115H requires a guide wire to return home.
While you can purchase your own wire, we recommend using the wire included with your Husqvarna installation kit as it's tested and proven for optimal performance.
Automower® PIN Support FAQs
To create your PIN code on your Automower® 415X, please follow the below setup instructions:
- Place the mower in the charging station.
- Turn on the mower. The first time you turn it on, the startup sequence will begin.
- You will be prompted to enter a PIN code, using the mower keyboard. Your code at startup should be 1111.
- You will then continue to select your settings. Push the arrow buttons and the OK button to select language, country, date and time.
- Once the startup settings are complete, you will be prompted to enter a new PIN code. This will become your personal PIN code for unlocking the mower in the future.
- Enter your unique 4 digit PIN code to complete setup. Note: It is not possible to use 0000 as a PIN code.
If you enter the wrong PIN code, you will be locked out of the mower for approximately 5 minutes. If you continue to enter the wrong PIN, you will continue to be locked out of the mower for increasing intervals, with a maximum of 4 hours between attempts. There is no way to override this lock. If your PIN isn’t working, wait until the mower is unlocked again and contact Customer Service at 833-991-ROBO (7626) from M-F 9am-6pm ET. Note: you may be asked for proof of purchase to verify product ownership.
If the keypad isn’t working, please call Customer Support at 833-991-ROBO (7626) from M-F 9am-6pm ET. Or bring the mower to your local Husqvarna Automower® dealer – click here (link to dealer locator?) to find your nearest dealer.
If you have an Automower® 415X, you can also type in your PIN code on the Automower® Connect app. However, we also suggest contacting Customer Service or your local dealer to ensure your mower is working correctly.
If you have an Automower® 435X AWD, it’s possible the jogwheel is stuck. You can fix this at home by pulling off the wheel and clearing any debris – click here (link to video?) for an easy-to-follow video tutorial. You can also bypass the mower interface and unlock the mower via Bluetooth®. However, we also suggest contacting Customer Service or your local dealer to ensure your mower is working correctly.
Have Questions?
If you have any questions or need additional support, call us at 833-991-ROBO (7626) M-F 9am-6pm ET.