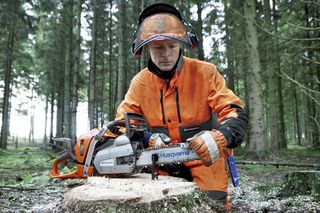
Our 7 best tips for safe, efficient tree limbing
When working with chainsaws, limbing a tree is usually the operation that requires the most time and effort. In other words you have a lot to gain by learning a good technique.
If you are a beginner at limbing, you should be aware about chainsaw safety and proceed slowly and methodically, gradually increasing the tempo. And always remember: if your back starts to get tired, this can be an indication that you need to fine-tune your technique. Here are some basic rules for safe, efficient tree limbing.
1. The right height
The best working height for cutting a tree limb is when the tree is placed from your waist to your knee height. You can achieve the right working height by trying to fell a tree so that it falls over other felled trees, logs, stones or elevations in the terrain. Remember to let your knees do the bending – not your back.
2. Steady and secure
Stand securely on the left side of the trunk with your feet apart at a 45-degree angle to the trunk. Work with the saw close to your body and keep your stance stable in two directions. Make sure you have an ample reach, so that you can keep the risky business of moving your feet while limbing to a minimum.
3. Keep it down
To avoid accidents, it’s important not to lift the chainsaw away from the trunk more than necessary. Carry the chainsaw as little as possible and use it as a lever, with the saw body resting on the trunk or your leg. Limbing will be easier and more effective with a short guide bar (13”-15”).

4. Controlled motion
Always hold the guide bar on the other side of the trunk when you move your feet. The chain must be static when you move. Hold the saw by both handles when moving short distances, never by the rear handle only. For longer movement, you should activate the chain brake and carry the saw by the front handle.
5. Beware of kickback
Avoid cutting with the guide bar tip. Your thumbs and fingers must always be wrapped around the handles during limbing work. Use a guide bar length that is adapted to the dimension of the tree.
6. Dodge the pinches
Determine how the branches are tensioned and cut on the opposite side of the branch, where the guide bar is not likely to be pinched under the weight of the branch. If you’re unsure cut the branch in stages, from the outside in towards the trunk.
7. Brake before branch-removal
Let the chainsaw rest on the trunk while you remove branches and firewood with your right hand. First, release the throttle and throttle lock and activate the chain brake. If the chainsaw is equipped with TrioBrakeTM, it’s even easier to activate the chain brake before removing the branches.
Cutting downwards, so that the chain tries to pull the saw towards the trunk, is known as cutting with a pulling chain. Cutting from beneath, so that the chain tries to push the saw towards you, is known as a pushing chain.
| Limbing the different sides of the tree trunk |
|---|
|

