Husqvarna Automower® - Frequently Asked Questions
Reasons to buy an Automower® robotic lawn mower
Automower® is very easy to own and operate and gives you more free time by maintaining your lawn on its own. Here are some of the ways Automower® makes life easier for you:
- Once you have installed and set up your Automower® robotic mower, it independently ensures that your lawn is well cut, without any involvement from your side. All you may have to do to get the perfect finish for your lawn is to occasionally use a grass trimmer.
- The initial configuration is quickly taken care of and the mowing schedule is easily set up, either using the Automower® Connect app or the user-friendly mower control panel.
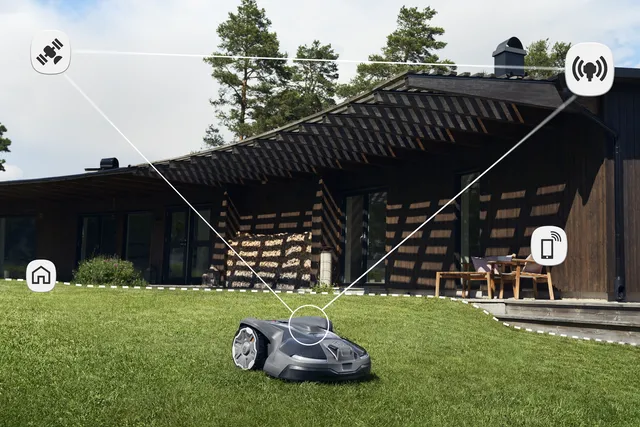
- The Automower® Connect app makes it easy to control and monitor your robotic mower from your smartphone using a Bluetooth, Wi-Fi or cellular connection or the cellular network. You can also automate several mower activities using smart home services such as IFTTT, Google Assistant and Amazon Alexa.*
- Your Automower® robotic mower gives you a freshly cut lawn 24/7 by clipping a little at a time. The clippings are tiny enough to be recycled into the lawn as natural fertilizer, so there is no need for you to handle them manually.
- No fuel to refill or electrical cords to worry about – your robotic mower finds its way to the charging station on its own and stays there until the battery is sufficiently charged and ready for the next mowing session.
- Very little maintenance is required. But now and then, depending on your lawn size, you should spend a few minutes cleaning grass from the wheels and chassis. And replacing mower blades regularly is vital to maintain an excellent cutting result.
- Husqvarna’s Automower® robotic lawn mower is a clear winner in many long-term tests and is acknowledged for being extremely reliable. The design of the mower handles mover is designed to handle most kinds of obstacles. You may sometimes have to give it a hand and do an occasional restart, but the built-in intelligence really does handle most tricky situations on its own, even when faced with challenging gardens.
Finally, Husqvarna has a strong dealer network with expert knowledge of Automower®. They can help you with anything that regards your robotic mower, such as installation, service and winter storage.
*Available for X-line models and models equipped with an Automower® Connect kit (accessory).
Not at all. You'll be surprised how quickly you forget about your Automower® robot mower. You'll hardly notice it as it rolls around your lawn doing its job quickly, quietly and efficiently.
The sound level of Automower® is very low, around 60 dB, which equals the sound level of a quiet conversation. This can be compared to the sound level of ordinary petrol lawn mowers or ride-on mowers, which generate between 95 and 100 dB(A).
You can easily have Automower® working in the garden without disturbing you or your neighbours.
The grass clippings from Husqvarna Automower® are so fine and small they don't need to be collected. The grass clippings instead fall to the soil, mulch and serve as a natural fertiliser for your lawn, resulting in a lush, healthy green lawn.
Automower® is good for your lawn and for our planet.
Since Automower® run on batteries, they generate no direct emissions like conventional petrol-powered lawn mowers do. On top of that, the actual energy consumption is very low (less than a traditional 60W light bulb). They are, in addition, very quiet and do not generate any noise. The sound level is only about 60 dB, which is equal to a normal conversation. This means that you can actually have your robot mower working while hosting a garden party, without worrying about any disturbing noise or fuel fumes.
What is more, because Automower® cut just a little grass on a continuous basis, the clippings are small enough to be recycled back into the soil as a natural fertilizer. The result is a greener, fuller, healthier lawn, and reduced need of synthetic fertilizers.
On the contrary, if you have grass allergies or hay fever, Automower® can be a good solution for you. Since you don’t need to be present when Automower® is cutting your lawn, you automatically eliminate most contact with grass waste. Also, the grass is kept so short that allergens do not become airborne.
How to use Automower®
You can easily do the installation yourself. Just follow the instructions in the operator’s manual or in our step by step guide. It takes approximately 2-5 hours, depending on the size and complexity of the lawn. The seller or service point may also offer the installation service, although it is not included in the recommended retail price.
Once the system is installed you have to switch on the main switch, press the START button and close the keypad hatch. To stop it, simply press the large STOP button.
No. The wire can be laid upon the ground using the supplied staples and will after some weeks be grown over and disappear in to the grass. A good tip is to cut the grass as short as possible at the perimeter in order to get the wire as close as possible to the ground. However, if you wish to bury the wire from the beginning, you can, the suggested depth is 3-10 cm.
Husqvarna Automower® automatically finds its way back to the charging station when it needs to recharge. When done charging, it starts to mow again.
Contact your dealer who will help you retrieve the mower PIN code, for some models this can be done via the Automower® Connect app.
Suitable gardens
Automower® can handle lawns up to 5000 m² +/- 20%, depending on model and complexity of the garden.
You can install two or more machines side by side. We have plenty of “multiple” installations in place throughout the world. Just contact your nearest dealer for support.
More or less, yes. Automower® works inside a boundary that is easily created by you or your local dealer. It is a dependable and effective system that can be customized to almost any garden layout.
Unless you have areas in your garden that your robotic mower installation does not cover, you will not need an ordinary lawn mower when you have installed your Automower® robotic lawn mower.
However, depending on how your installation is made, you may need to complement the edges with a trimmer to get the perfect finish for your lawn.
The basic rule is, that what you can mow with a conventional mower you can normally mow with Automower®. The convenience advantage may be limited in a very fragmented lawn, that is, if your lawn consists of many small patches of lawn separated by for example steps, as the mower has to be moved manually between them.
When installing the boundary, you just need to make sure that the mower cannot go to areas you do not wish to cut, such as flower beds and rockeries. Automower® will go only where you want it to go – never in the street or into a neighbour´s garden.
Tough slopes need to be matched by a robotic mower optimized for slope performance. Husqvarna Automower® can handle up to 50% slope performance depending on model and if your lawn has really tough slopes you should look into our all-wheel drive model 435X AWD. Our all-wheel drive model can tackle slopes up to an impressive 70% (35˚), which is equal to a black ski slope.
To minimize the wear on the grass in tough slopes, it is important that the guide leads the mower diagonally up and down the slope. If a slope is very steep (50–70%), you also need to make sure that there are no obstacles, such as trees or stones, in the slope.
Remember to clean the wheels from grass regularly with a soft brush. If there is a lot of grass stuck on the wheels, the mower may not be able to get up and down the slope as intended.
There is also a robotic mower terrain kit available for most models (accessory), containing heavy rear wheels and wheel brushes for excellent traction on sloping lawns.
On the contrary, Automower® is small enough to follow the curvature of a rough lawn. It will not scalp the “hills” like many larger mowers. Due to the large driving wheels, Automower® can cope with uneven surfaces very well. It also handles slopes up to 70% (35°) incline. Only small deep holes may cause Automower® to get stuck.
Yes, Automower® can handle narrow passages down to 60 cm widths, depending on the model used.
Husqvarna Automower® mows in rain or shine and delivers a newly cut lawn every day.
Some models have an object avoidance feature which can detect objects on the lawn and cause the mower to turn to avoid them. However, it is advised for the owner to keep the lawn surface free from objects to avoid damage to the object, as well as damage to the machine’s blades. Make sure your lawn is clear of small objects before operating Automower®.
To maximise the life of the blades these types of objects should be raked or collected regularly. They will not damage the mower, but the blades will wear faster. Tree branches may also damage or bend the blades resulting in a poor cutting performance.
Provided the boundary has been installed correctly around your flower bed, tree, shrub, or other object, Automower® cannot damage it or intrude into that area.
If you, at a later point, need to temporarily fence off a certain area from being mowed by your robotic lawn mower, Husqvarna offers a range of zone control solutions which you can view here, for example when the spring flowers are blooming, when the kids’ inflatable summer pool is in use, or when you have a spot with freshly sown grass.
Safety
Even though Automower® uses very low power, you can still cut your fingers or toes if they get in contact with the blade. A built-in safety feature means the blade will automatically stop if the mower is lifted or turned over. The distance between the outer body and the blade tip is also extra-long to avoid feet or hands from accidently reaching the blades. Even so, we recommend turning off Automower® when small children and pets are on the lawn.
Yes. Automower® has several theft protection systems that may be activated. Most important: Automower® cannot be used without the personal PIN code. The installation lock prevents Automower® from functioning on any other installation than your own. The time lock requests your four-digit PIN to be entered at an interval decided by yourself. The alarm requires the PIN code to be entered when Automower® is stopped – or an audio alarm will go off. Also, Our X-line models are equipped with geofence tracking
Maintenance and service
You can get service and find spare parts at your nearest authorised service point. To find it, go to the Dealer locator facility.
This depends on the set running time of the mower. In order to save your battery you should set the timer according to the size of your lawn. During the dry season you can easily reduce the running time without losing performance.
The life of the blades depends on the type of soil and grass. Typically, the life is 1-2 months on 1000 m². You can replace the lightweight robotic mower blades in five minutes using a regular screwdriver. Follow our step by step guide here.
Yes, if you don’t have to mow in the winter. Before storing Automower® it should be fully charged, cleaned and wiped dry and then stored in dry frost-free conditions. We also recommend that the charging station is stored indoors over the winter. The loop wire installation should remain in the lawn. A Husqvarna dealer also provides winter service and storage which is a good option if you want to make sure that Automower® is ready for the new season when spring arrives. Husqvarna offers a range of Automower® accessories for storing your mower.
Replacing blades regularly is vital to maintain an excellent cutting result. Now and then, depending on your lawn size, you should spend a few minutes cleaning grass from the wheels and chassis. Husqvarna offers a range of Automower® accessories for maintaining your mower.
Automower® Connect app
Select Forgot password at the login screen in the Automower® Connect app and enter the email address connected to your Automower® Connect app account. A password reset link will now be sent to your email account.
To change the password to your Automower® Connect app account, select Account on the mower menu and tap Password. Then enter your current password and the new password and confirm that you want to change your password.
Yes. To change the email address or password used for logging in to Automower® Connect, select More > Account > User ID in the Automower® Connect app and update your email address and password.
No, the mower PIN code and other security settings cannot be changed from the Automower® Connect app.
The pairing between your account and the mower is removed. All other accounts that are paired to the mower still have full access.
There are two ways to remove pairings from Automower®. Which way to choose depends on if you want to remove all pairings or a single one.
Note: If you sell or buy a used Automower® robotic mower, we recommend that you remove all existing pairings before the new owner starts using the mower.
Remove a single pairing from the mower
To remove the connection between an Automower® Connect app account and your mower, you can use the unpair command in the Automower® Connect app.
Remove all pairings from the mower
To remove all pairings from the mower, you need to remove the pairings using the menu on the mower.
This is fully normal behaviour.
Buying Automower®
To find the dealer closest to you, go to the Dealer Locator.
The price varies depending on model. See the full assortment of robotic lawn mowers.